This article describes how to set up a original C/C++ development environment for Raspberry Pi Pico or Raspberry Pi Pico W with Pico SDK or Raspberry Pi 4.
Setting up the C/C++ development environment including Pico SDK, Visual Studio Code and remote debugging is quite easy and takes only a few minutes – ok, the wiring for the remote debugging takes some additional minutes.
The document ‘Getting started with Raspberry Pi Pico, C/C++ development with Raspberry Pi Pico and other RP2040-based microcontroller boards‘ describes two different types of installation:
- Installation with the script pico_setup.sh.
Everything needed is installed with one script. See Chapter 1. Quick Pico Setup. - The manual installation is described step by step including examples how to used the different tools in the chapters 2 to 7.
For beginners I recommend to use the script pico_setup.sh, the result is the same as with the manual steps. But for a better understanding you should still read the chapters 2 to 7.
I use the following wiring for remote debugging with Visual Studio Code and OpenOCD:
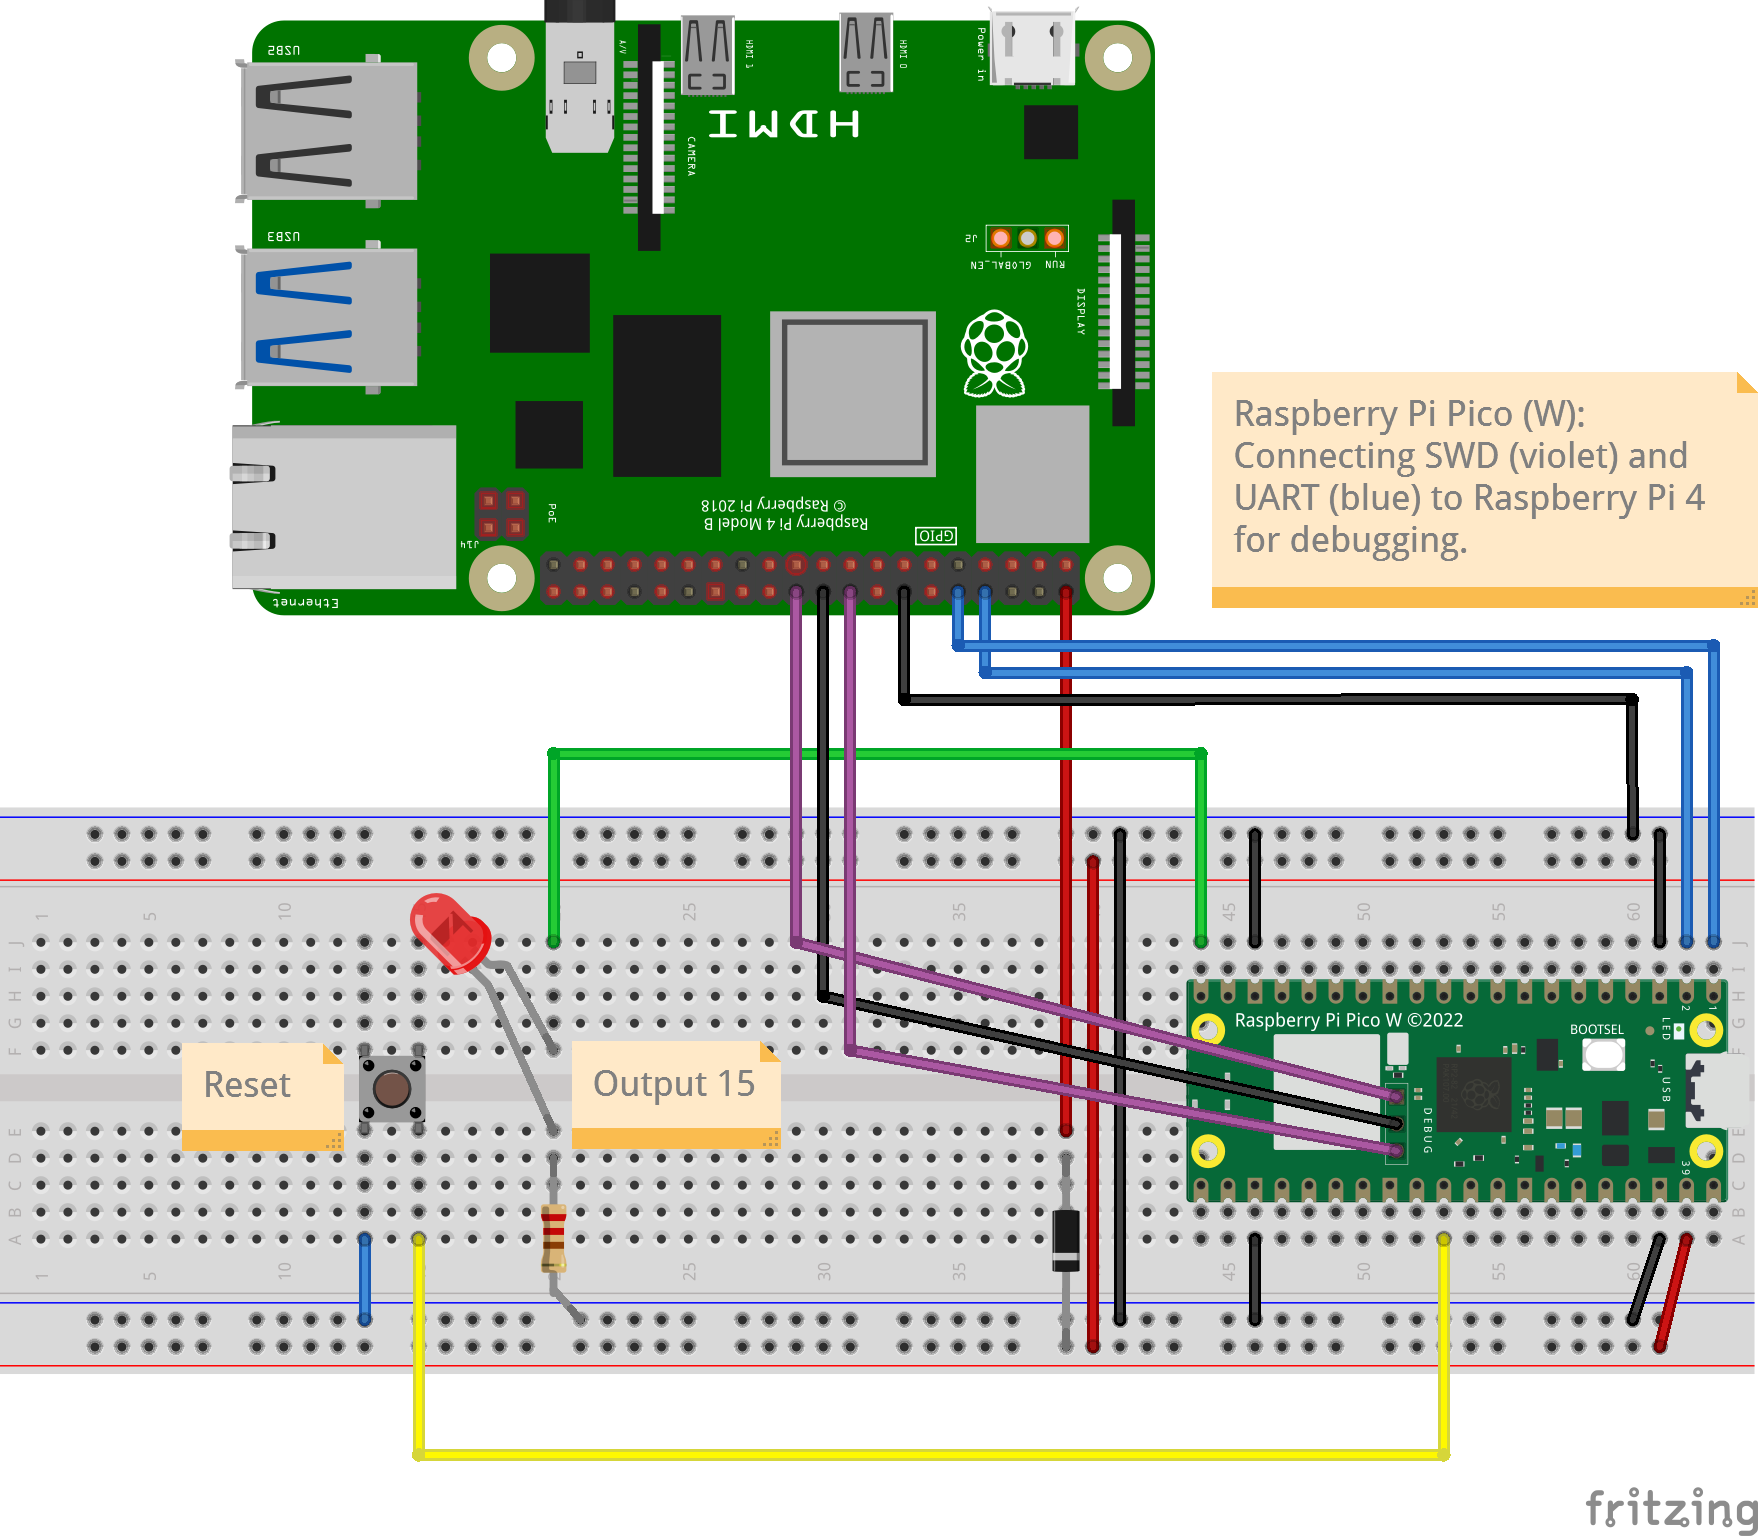
Example application, based on SDK example https://github.com/raspberrypi/pico-examples/tree/master/blink but using an external LED:
#include "pico/stdlib.h"

int main() {
    const uint LED_PIN = 15; // external LED connected to GP15
    gpio_init(LED_PIN);
    gpio_set_dir(LED_PIN, GPIO_OUT);
    while (true) {
        gpio_put(LED_PIN, 1);
        sleep_ms(100);
        gpio_put(LED_PIN, 0);
        sleep_ms(100);
        gpio_put(LED_PIN, 1);
        sleep_ms(100);
        gpio_put(LED_PIN, 0);
        sleep_ms(1000);
    }
}